ZEISS
AMERICA North (USA-Canada-Mexico)
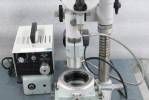
Zeiss Toolmakers Microscope with Light Sectioning Capability
This is a Zeiss Toolmakers Microscope with Light Sectioning Capability. *Excellent Used Condition!*
This Microscope has been examined by an experienced technician and is in excellent condtion.
Custom made by Zeiss w/ Vernier Protractor Head is capable of Light Sectioning. This microscope can measure geometry in normally inaccessible areas and can be used as a more conventional toolmakers microscope as well. The purpose of light sectioning is to allow measurement of geometric shapes that are normally inaccessible to standard optical microscopes. A typical use would be to observe and measure features such as that of a machinist scale line or skive marks, blemishes in machined or molded parts etc. Mounting of samples on the x-y table varies according to the design of the sample; this could be as simple as holding with modeling clay to the use of custom holding fixtures.
This system when used as a sectioning microscope should be setup and operated as follows:
With the instrument in calibration (axis properly aligned),
1.) The main eye piece cross hairs, and the protractor eye piece vernier scale should be put into focus for the operators eyes (adjust the eyepiece).
2.) The protractor heads vernier scale should be set to 0.
3.) The sample is placed onto the x-y stage such that it is true with the x-y axis.
4.) The sample is tilted back about 5 degrees. (The collimated light source is also tilted at 5 degrees and intersects the sample a right angle). Any cosign error due to slight deviations of this 5 degree angle is insignificant.
5.) The sample is brought into view under the objective lens which should now be visible in the eyepiece.
6.) The slit of the collimator should be adjusted such that a minimum width of light is seen on the sample through the eyepiece. The light should also be in focus on the sample using the collimator focusing knob. (Once these are set they should never be moved while measuring a sample or sets of samples).
7.) When viewing a sample through the microscope, the illuminated sample should appear to have a strip of light across its surface. The operator should choose either the top or the bottom edge of this strip of light for all measurements, select one and stick with it for all measuring.
8.) Measurements are obtained by placing the dead center of the cross hairs onto the edge where the light intersects the samples feature of interest. Angular measurements can be taken with the protractor head. The x-y stage is moved so as to measure the feature of interest..
To use as a conventional tool makers microscope
1.) Do not use the collimated light source.
2.) Obtain an external light source and use in the conventional manner..

